
Have you ever had to maintain data in multiple Salesforce orgs? Maybe your company was acquired, but the CRMs haven’t been merged, or your organization started with separate CRMs per team and you still need to refer to data in your old database. Either way, searching and editing data in multiple Salesforce orgs is painful.
Unless you have GridBuddy Connect.
Using GridBuddy Cloud to edit multiple CRMs at once
With GridBuddy Cloud, you can pull data from up to five different Salesforce orgs into a single grid. There you can edit data from any of those five orgs in one grid, and your changes will be saved to the correct CRM database. Here’s an example.
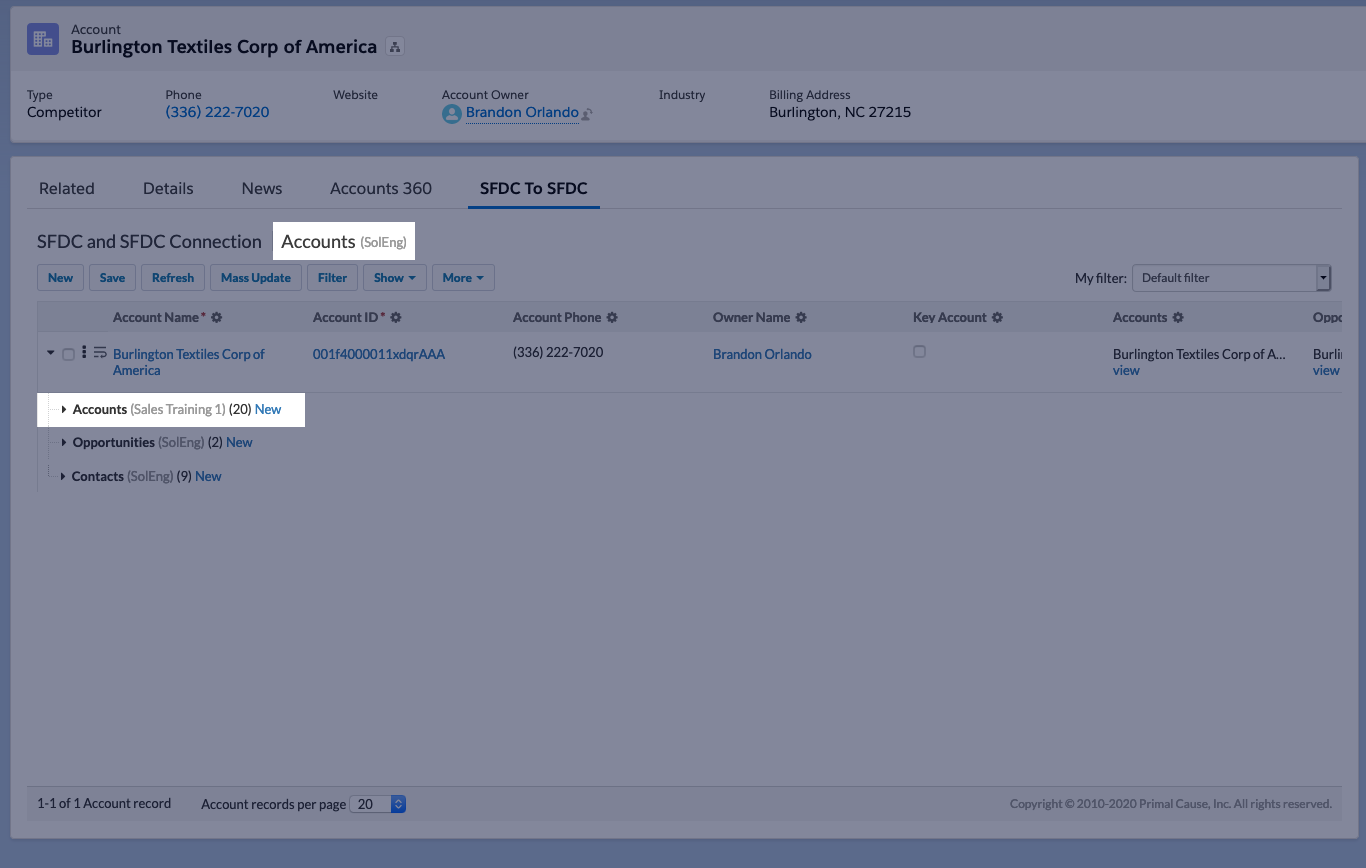
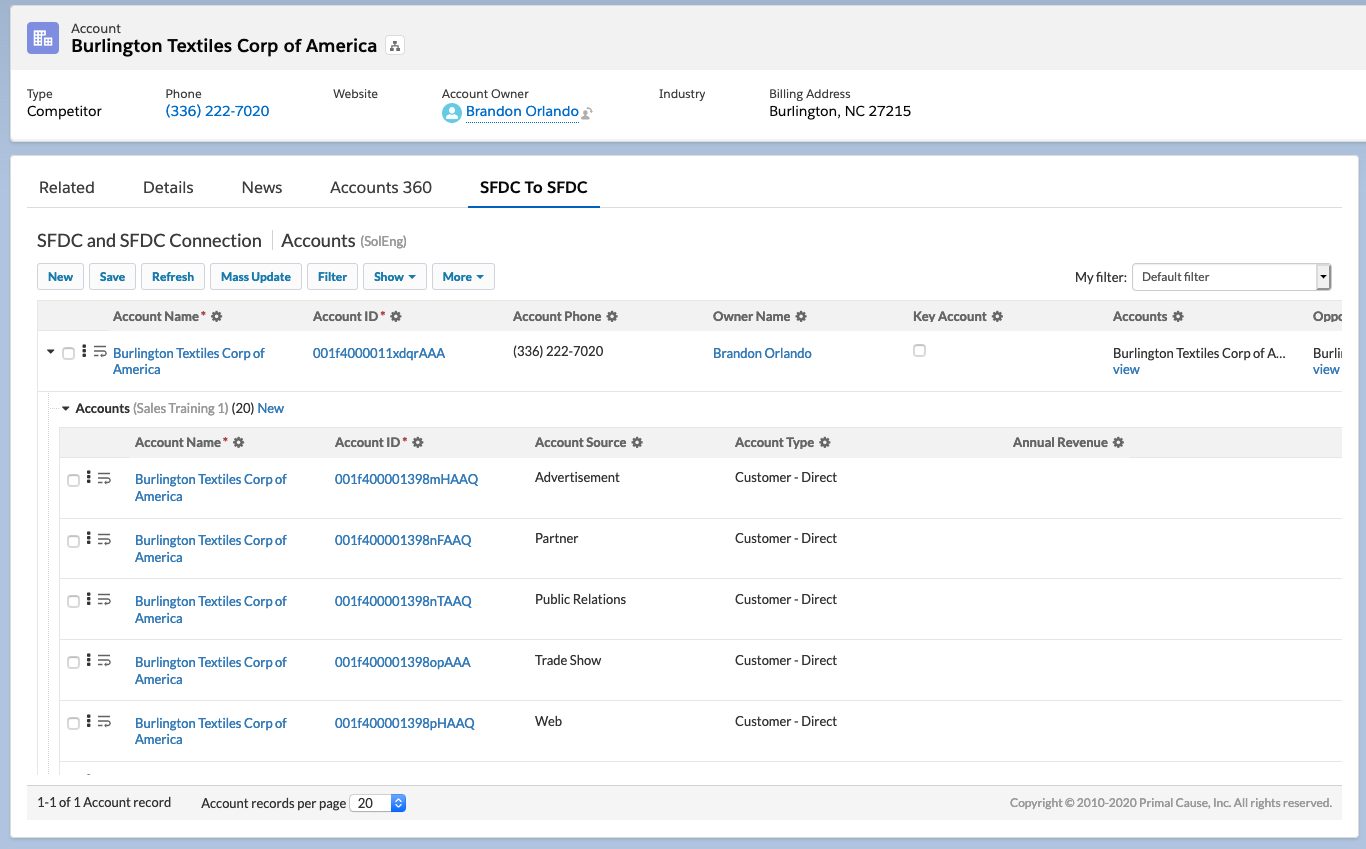
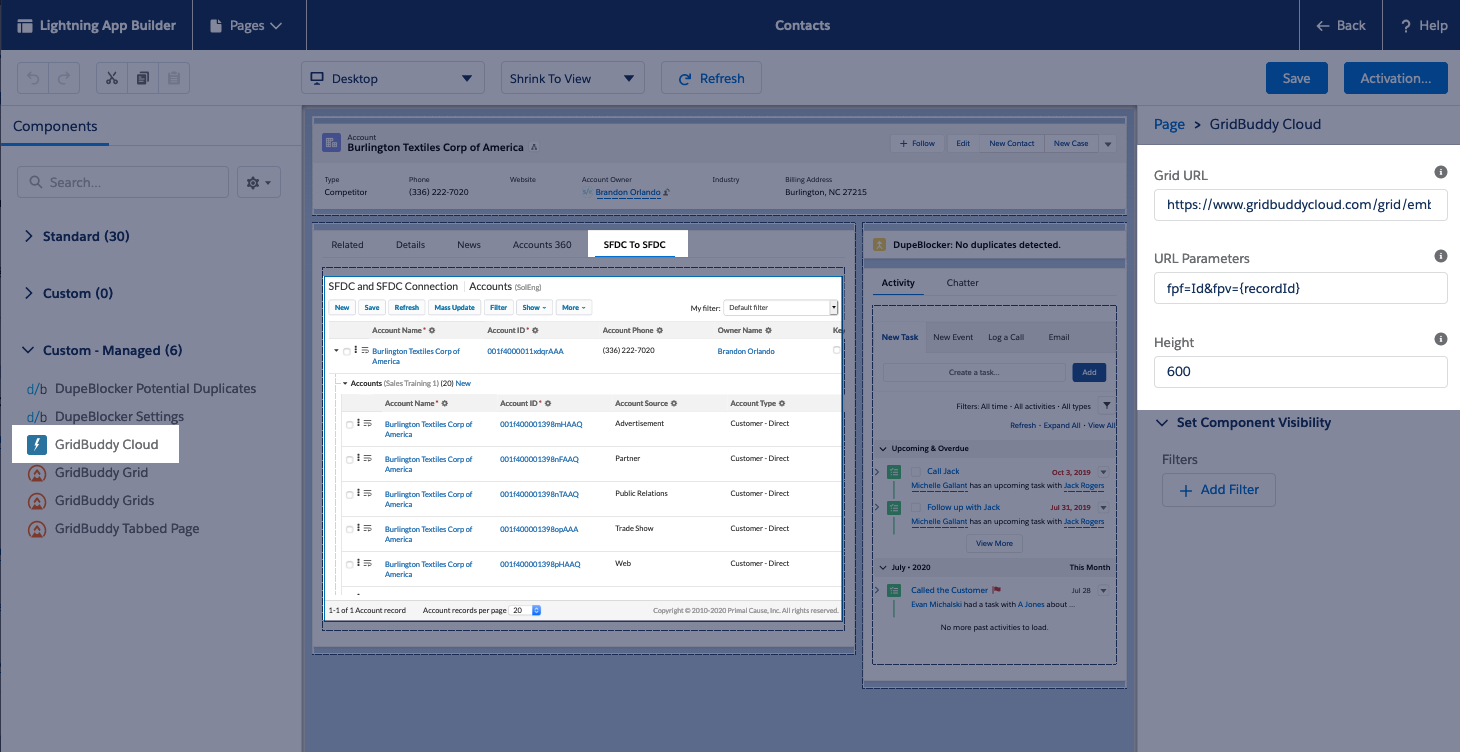
The below Account grid shows three objects: Accounts, Opportunities, and Contacts. You can see the datasource for each object to the right of the object name. Notice how the “Accounts” object comes from the “Sales Training 1” datasource, while the “Opportunities” and “Contacts” objects come from the “SolEng” datasource?
With this grid, I can see all accounts associated with this “Burlington” account, even if they come from a different Salesforce org. I can update that account information right here, and have my updates saved in the Sales Training 1 CRM, even though I made the changes while working in SolEng.
How do I set up a grid with child objects from a different CRM?
The first step is to make sure you have a GridBuddy Cloud account, and you’ve installed the GridBuddy Cloud Salesforce app into all your CRMs. Here’s an article walking through that process (log in to the Validity Community to view it).
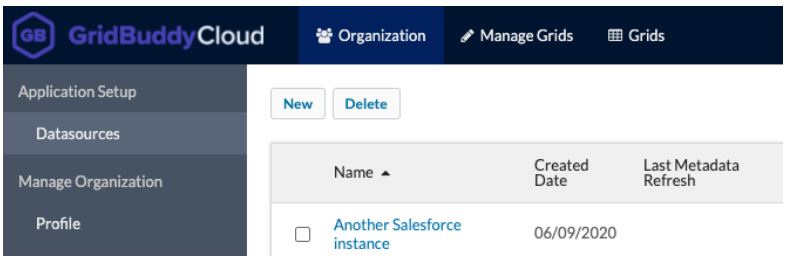
First, you will create connections to the Salesforce orgs in you would like to bring into the grid in the Organization > Datasources tab in GridBuddy Cloud. The Org Admin will create a connection to the datasources with their User credentials, and End Users will authenticate uniquely to each org when they load the grid using their individual Salesforce credentials.
Once you’re all set up and your datasources are tested and saved, you’re ready to build some grids. Click on the GridBuddy Cloud Wizard tab in the Salesforce GridBuddy Cloud app and select “create a new grid.” Your parent datasource should be the CRM to which everything else points. In my example, my parent datasource will be my SolEng org. Select your parent object (example: Account) and click “next” to move to step two of the Grid Wizard.

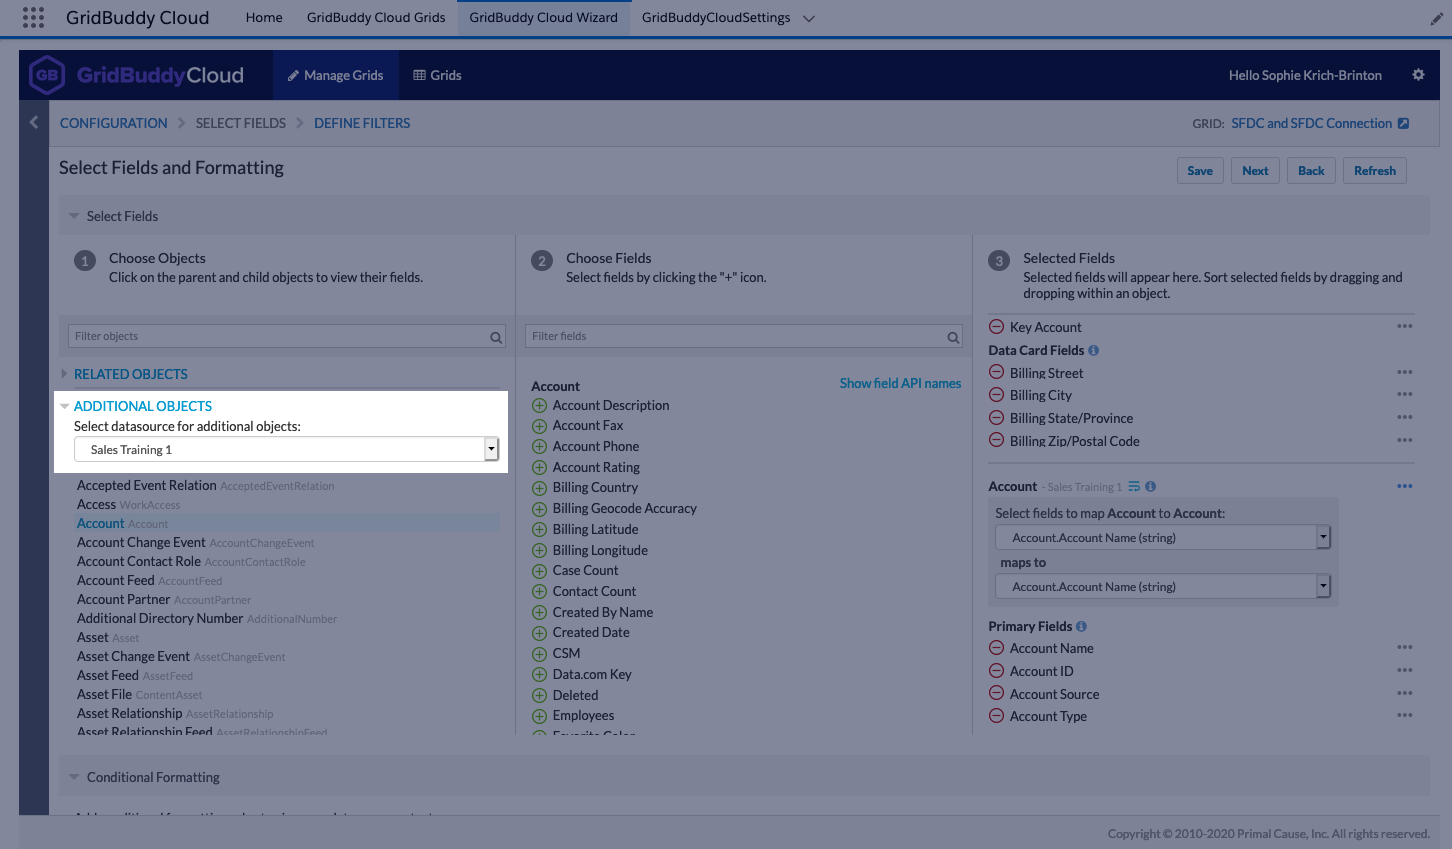
Step two is where you select the child objects for your grid. In the left-hand column, scroll down to the “Additional Objects” section. If you have set up more than one datasource, you’ll see a picklist from which you can select them. Note: If your datasource connection isn’t working, the datasource will not appear in this list.
Select the datasource for your first child object, then click on the object within this datasource you’d like to bring into your grid.
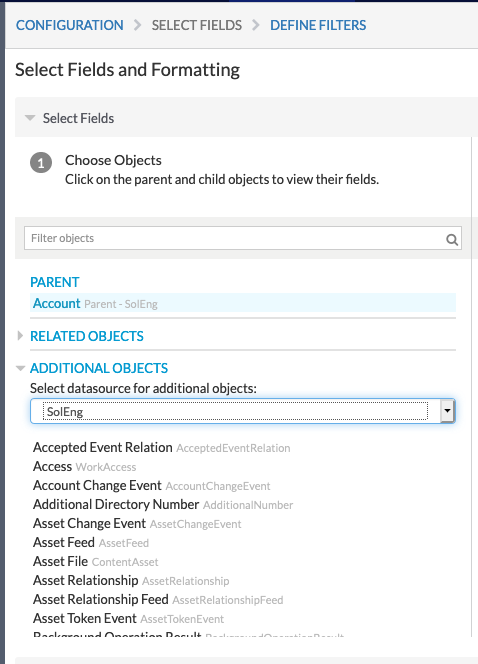
As soon as you click on the object of your choice, you’ll see all available fields in the central column. Click the green + to add fields to your grid.
In my example, I selected “Sales Training 1” as my child object datasource, and clicked the “Account” object.
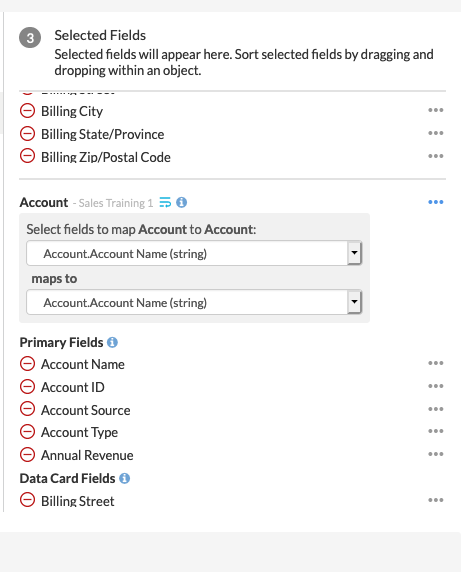
Adding fields from a different datasource into your grid means you’ll need to map that child object back to your parent object, so your grid only shows child data related to the parent object. Otherwise, what’s the point?
Pick the fields that will successfully map your parent object to your child object. For my Account:Account example, I’ve mapped using the Account Name field. This will work if the account names are identical across my CRMs. You know your datasource well, but even so, this might require a bit of trial and error. The way to confirm whether your mapping has worked is to save and load the grid, and check whether you see any children records. If you don’t, but you know this record should show some results, the mapping isn’t quite right.
How can I use this grid most effectively?
You have a few options for accessing your grids. You could create a full page workspace by putting a tabbed page of grids onto a Salesforce Lightning Tab. You could use the GridBuddy Cloud Grids tab, which is available in your GridBuddy Cloud app. But what I like best is embedding a grid onto a Salesforce record, replacing the need for Salesforce’s Related Items.
I’ll dig into the details of how to do this in a later post, so for now all I’ll say is: Edit your Salesforce Record, add a tab for your grid, throw on the “GridBuddy Cloud” Custom-Managed Lightning component, and paste the “embeddable URL” for the grid you want to appear here (copy it from step one of the Grid Wizard).
You’ll need to use URL parameters to filter your grid so it only shows data related to the Salesforce record you’ve embedded it on. In my example (Account:Account), my parameters will be fpf=Id&fpv={recordId}. I promise to dig into this in a later blog.
Click “save,” click “back,” and you’ll have a sweet embedded grid providing related data from a completely separate Salesforce org.
Awesome.
Interested in trying it out? Let us know.