
Table of Contents
It might shock you to learn that 80 to 95 percent of all cyberattacks begin with a phishing email. With artificial intelligence (AI) helping cybercriminals create more sophisticated attacks, it makes sense that the global cost of cybercrime will rise to $10.5 trillion by 2025.
Fortunately, you can take action to protect yourself, your brand, and your customers from even the most convincing phishing and spoofing attacks. That’s where authenticating your email with a properly formatted SPF record comes in. Continue reading for a full explanation of SPF records and how to create them.
What is an SPF record in email?
A Sender Policy Framework (SPF) is a type of Domain Name System text record (DNS TXT) that allows senders to specify which IP addresses are authorized to send email on behalf of a particular domain.
Why is this important? SPF-protected domains are less attractive to fraudsters and are therefore less likely to be blocklisted by spam filters. This protection is especially important for custom domain email addresses, as they’re the least likely to receive it from Email Service Providers (ESPs).
SPF email authentication also improves email deliverability for messages coming from your server. Email deliverability refers to the chances your message will reach your recipients’ inboxes rather than getting redirected to their spam or junk folders.
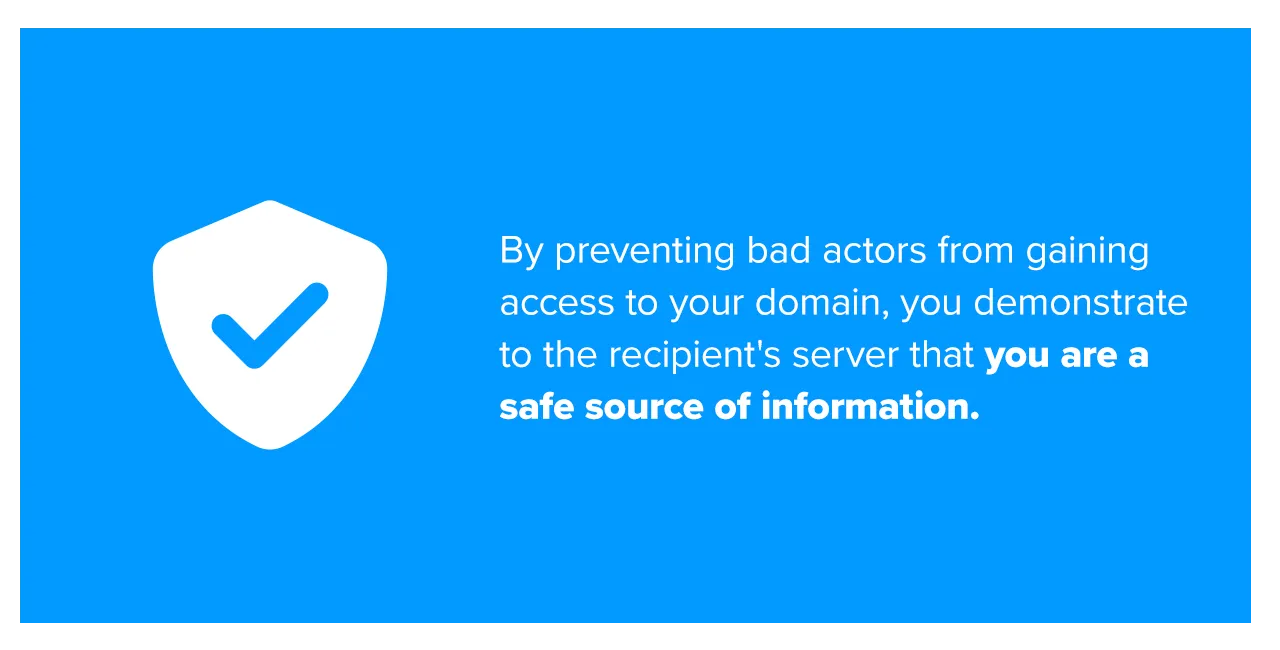
By preventing bad actors from gaining access to your domain, you demonstrate to the recipient’s server that you are a safe source of information. This added reputability significantly improves the likelihood that people will see your messages.
A basic overview of an email SPF record
The key components of a typical SPF record include:
- Version number: A “v=spf” followed by the version number indicates the SPF version you are using. For example, most SPF records begin with “v=spf1,” which means they are using the first version of SPF.
- Mechanisms: SPF mechanisms help the server determine whether an incoming email’s IP address or domain name matches one already in the predefined record. Each mechanism belongs in a different part of the SPF record format.
- IP address and SPF record domain name: The SPF record typically contains one or more IP addresses that are authorized to send mail from your server.
- Quantifiers: SPF quantifiers tell the server what to do with an incoming message based on whether it passes or fails the authorization test.
- Modifiers: SPF modifiers extend the record with value or name pairs separated by the “=” sign. These modifiers provide additional information to the server that instructs it what to do with an incoming message.
SPF record mechanisms explained
A typical email SPF record will contain at least some of the following mechanisms:
- a: The “a” mechanism authorizes any server in the domain’s A record to send mail to that server.
- mx: This mechanism directs the system to authorize an address using the MX record, which contains the DNS information for the mail server.
- all: This mechanism appears at the end of an SPF record and can have different interpretations based on the qualifiers used.
- ip4: This mechanism authorizes any sender from the included ipv4 address range to send messages on behalf of your server.
- ip6: Similar to “ip4,” this mechanism authorizes any sender from the included ipv6 address range to send messages on behalf of your server.
It will typically also contain one of the following quantifiers to direct the server on how to manage messages:
- Hard fail (-): A “-” directs the server to reject any messages coming from addresses that don’t match anything in the DNS record.
- Soft fail (~): A “~” indicates that a message probably isn’t coming from an authorized sender. While the server will typically accept the message, it will also flag the source as suspicious.
You might also see a pass (+) or a neutral (?), but these quantifiers are rare because they tend to be less secure.
How should an SPF record look?
This TXT SPF record example shows how to combine those components:
- Version tag: Start your SPF record with the version one tag (v=spf1).
- IP addresses: Then, list all IP addresses that are authorized to send mail. It should look something like “v=spf1 ip4:1.2.3.4 ip4:2.3.4.5”.
- Include statement: Adding an “include” statement authorizes a third party to send an email on behalf of the specified domain if needed. This string will read “v=spf1 ip4:1.2.3.4 ip4:2.3.4.5 include:thirdpartydomain.net”.
- All tag: End the record with either an ~all tag or -all tag to establish how the server should respond to unauthorized domains. The -all tag applies a hard fail rule to all domains aside from those listed in the record, making it the more secure option.
- Double-check: At the end of this process, you should have a record that looks like this: “v=spf1 ip4:1.2.3.4 ip4:2.3.4.5 include:thirdpartydomain.net -all”.
How to set up an SPF record in 5 steps
Since email authentication can be technical and somewhat confusing, let’s break down the process of setting up an SPF record into five simple steps.
Step 1: Identify IP addresses used for sending email
First, make a list of all the mail servers and IP addresses your organization uses to send emails on behalf of your brand. This list may include:
- Internal mail servers, like Microsoft exchange
- Web-based servers
- Your end users’ email servers
- Your ESP’s mail server
- Authorized third-party mail servers
Need help finding the right addresses? You can contact your IT System Administrator or your ESP for a complete list of all the IP addresses associated with your account.
Step 2: Identify all sending domains
While most companies own many domains, they typically only use some of those domains to send email.
Creating email SPF records for all your domains—even those you don’t use for sending mail—helps reduce your risk by protecting your non-sending domains from spoofing.
Again, you can get this information from your IT System Administrator or your ESP.
Step 3: Create an SPF record
You’ll want to rely on your IT team or ESP to handle the task of actually creating your SPF record. They’ll use the information you provide and the formula shown above to create a functional SPF record that meets your needs.
Step 4: Publish the SPF record
Your company’s IT or security team will then publish your new SPF record to DNS with the help of your DNS server administrator. ESPs will typically publish SPF records on your behalf, but if you don’t use one, you will have to do it yourself.
Here’s why that matters. The DNS record is what your system uses to map URLs to numerical IP addresses—specifically, to IP addresses authorized to send mail on your behalf. When you receive an email, the SPF record compares the sender’s IP address against the list of authorized IP addresses in the DNS record and responds accordingly.
This process is typically straightforward for companies that use hosting providers like GoDaddy and 123-reg. However, if your ISP is the one who administers your DNS record—or you’re unsure who’s responsible for this task—you can find out from your IT department.
Step 5: How to check an email SPF record
Testing to make sure the SPF record is working as expected is an important step and should be completed before sending any email campaigns. We also recommend reviewing these pre-send optimization tips as well before hitting send.

Using an SPF check tool to test your completed record will show you what your audience sees, which is a complete list of authorized servers. If you notice one or more trusted IP addresses are missing, all you have to do is update the record to include them.
Common errors in email SPF records
Not taking the time to properly format your SPF record can result in error messages and loss of domain credibility, which can affect your email marketing campaign.
Some of the most common errors you might encounter when creating SPF records include:
- Long character strings: Exceeding 255 characters in a given string will produce an error message stating you’ve run out of space. If needed, you can get around this error by creating multiple strings within the SPF record.
- Too many lookups: Including more than 10 mechanisms that trigger DNS lookups will result in a PermError. The “all,” “ip4,” and “ip6″ mechanisms are exceptions to this rule because they don’t require SPF DNS lookups.
- Multiple SPF records: You can only have one SPF record for each SPF version in a domain. Rather than creating new records any time you need to add information, you should update the existing one.
- Typos and formatting errors: Extra spaces before or after strings, misspelled tags and mechanisms, uppercase characters, commas, and improper syntax are all formatting errors that will result in an invalid SPF record.
When setting up an SPF record, it’s important to check your work for errors using an SPF check tool and proofreading for syntax or formatting issues. This extra step can prevent serious issues later on.
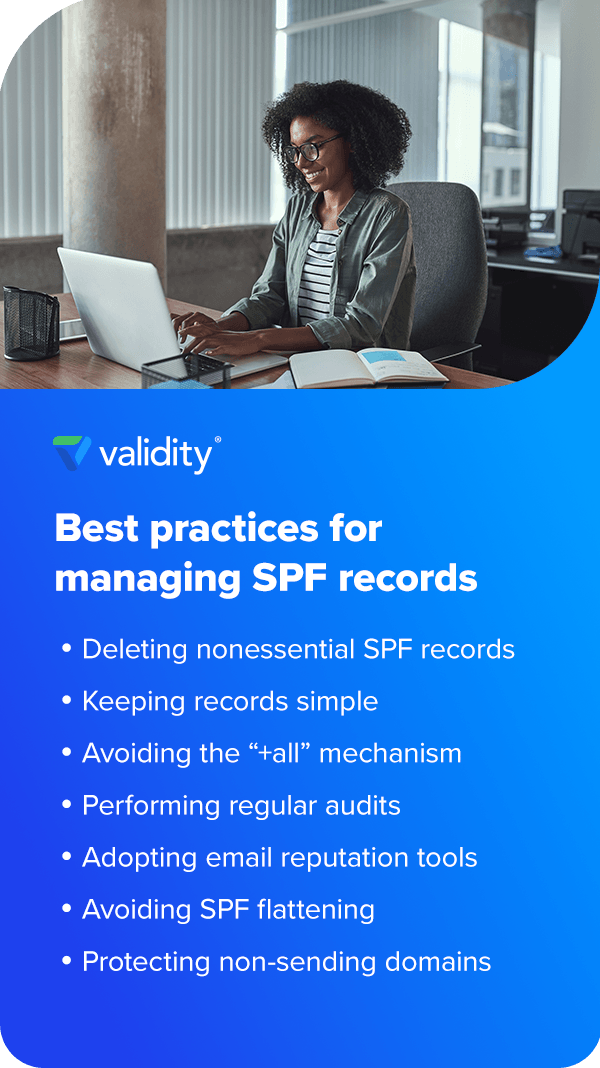
Best practices for managing SPF records
Effectively manage new and existing SPF records for your domain by:
- Deleting nonessential SPF records: Discard any duplicate records, top-level domain includes, and records from third parties with incompatible SPF records.
- Keeping records simple: Limit your use of mechanisms and modifiers to prevent confusion and syntax issues. Try to avoid including more information than necessary.
- Avoiding the “+all” mechanism: This tag authorizes all IP addresses—including fraudulent ones—to send emails on behalf of your domain, which can impact domain credibility and email deliverability.
- Performing regular audits: Ongoing domain maintenance procedures should include routine audits of your SPF record database to ensure all records are necessary and properly formatted.
- Adopting email reputation tools: An email reputation management solution supplements your SPF records by boosting your IP reputation. The more trustworthy your IP, the easier it is to ensure your messages arrive in the right inboxes.
- Avoiding SPF flattening: SPF flattening converts SPF record domain names to IP addresses, allowing you to get around the maximum 10 DNS lookups. However, this technique can open your server to more domains than you may anticipate.
- Protecting non-sending domains: Unused domains can make easy targets for cybercriminals. If you have any domains that do not send emails, protect them from attackers by adding the “-all” mechanism at the end of their email SPF records.
Frequently asked questions about SPF records
This section addresses common questions about SPF records, an essential part of email authentication.
1. What is an SPF record for?
An SPF record is used to protect email senders and recipients against spoofing, phishing, and spam attacks. It requires a mail server to verify an email’s IP address so malicious senders can’t pretend to deliver an email from a legitimate company’s domain. If the sender’s IP address matches the SPF record, the email is accepted. If it does not, the email is flagged as spam.
By keeping spammers from accessing your domain, you show your recipient’s server that you are a safe source of information, improving the chances people will see your messages.
2. What should be in your SPF record?
Your SPF record should include the version one tag (v=spf1) and all the mechanisms needed to verify which host names and IP addresses are authorized to send messages from your domain. It should also have an “include” statement and an ~all tag or -all tag. Here’s an example of an SPF record in an email authentication:
“v=spf1 a MX include:spf.yourbusinessdomainname.com ~all”
3. How much does an SPF record cost?
There is no direct cost for creating and using an SPF record. It’s a standard email authentication technology that is publicly available and doesn’t require a paid subscription or service. The only cost might be related to your domain registrar’s DNS management fees if you need to modify your DNS settings to add the SPF record.
4. Where can you publish your SPF record?
You can publish your SPF record in your registrar’s DNS control panel area. To access this control panel, you’ll need to log into your domain account at your host provider and navigate to the section to update your DNS records. It might be called something like “DNS management” or “name server management,” for instance. You can then select the domain for which you want to modify the records, add your SPF text to the TXT record, and publish.
You can then use an SPF record checker tool to analyze your domain’s DNS settings and ensure your SPF record is published correctly.
5. How many SPF records should you have?
You should only have one SPF record on a single domain. The Internet Engineering Task Force (IETF) explicitly forbids multiple SPF records for a single domain. If a domain has more than one SPF record, all emails from that domain will receive a PermError and may end up in spam. If you need to include more than one SPF record for a domain, you can merge them into a single record.
SPF records are a piece of the email deliverability puzzle
At Validity, we aim to empower you with information and products you can use to launch an effective email marketing strategy. Knowing how to create a mail SPF record is an important step in improving both your security and your email deliverability.
For an easy, 30-minute breakdown of SPF email authentication and other authentication protocols, watch our on-demand webinar, “An Email Marketer’s Crash Course in DMARC, SPF, and DKIM.”
