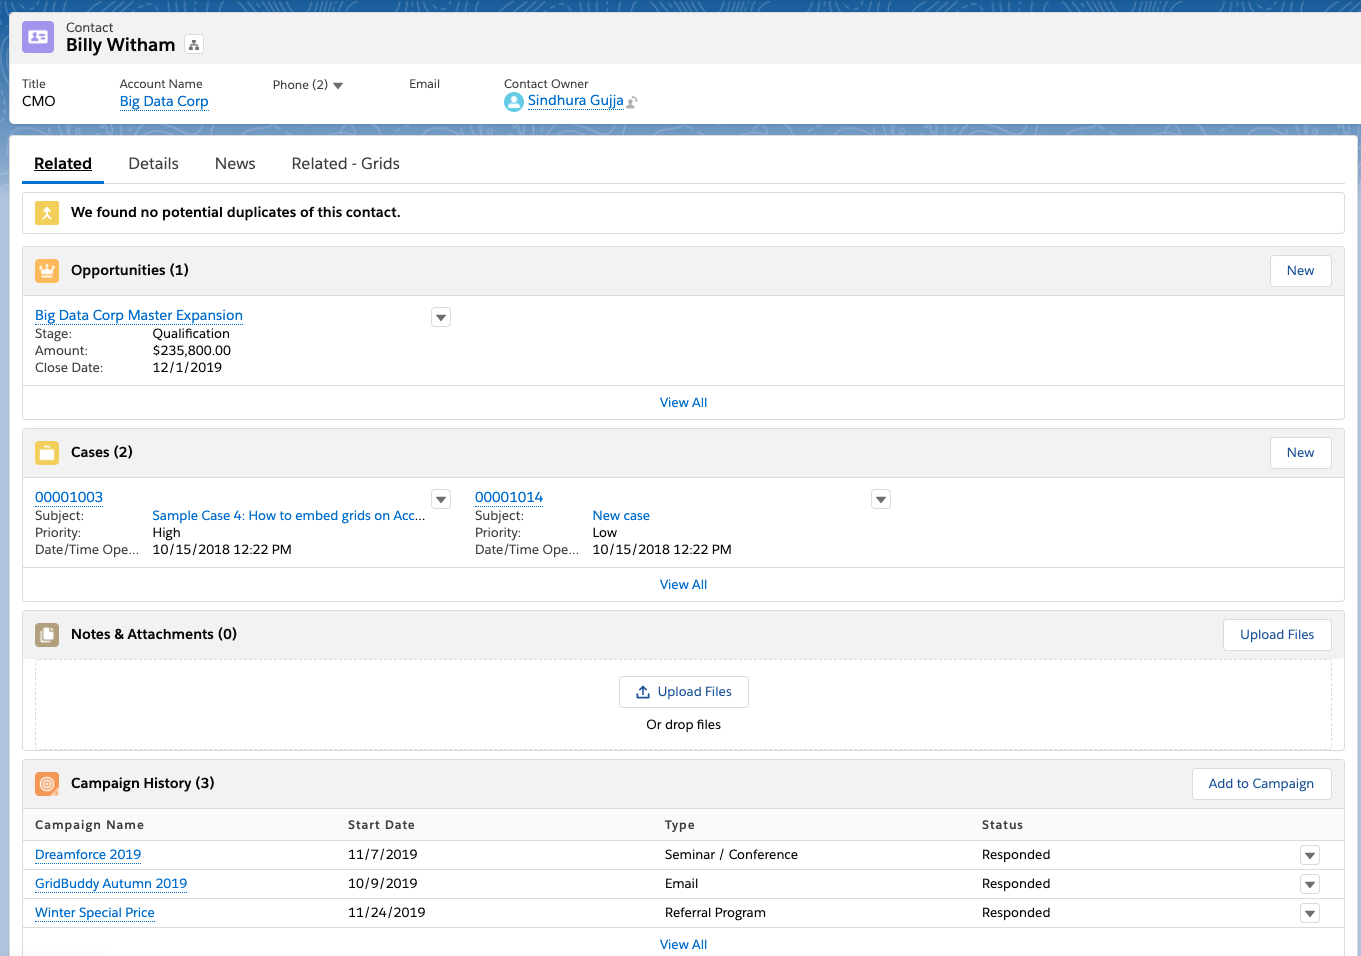
Hmm…How can I best describe Salesforce’s Related Items? They show me almost what I need, but not the complete list. The records are almost within reach, but not quite. Related Items show me records related to the record I’m on.
Seems like the perfect solution, right?
Except the Related Items tab only shows six records for each related object, and I have to click “View all” to see more – which takes me into a new window. Also, I can’t edit anything from the Related Items tab. If I need to edit a related item, I have to open a new window to see the full list, then open the individual record I need to edit.
Time consuming, confusing, and labor intensive.
Instead of Related Items, I use GridBuddy Cloud.
A tabbed page of GridBuddy Cloud grids embedded onto the record can effectively replace the need for Related Items. You choose how many records appear in the grid and they’re editable right there, allowing you to not only access all your related items, but make changes to them without leaving the Salesforce record.
How do I set up a tab for GridBuddy Cloud?
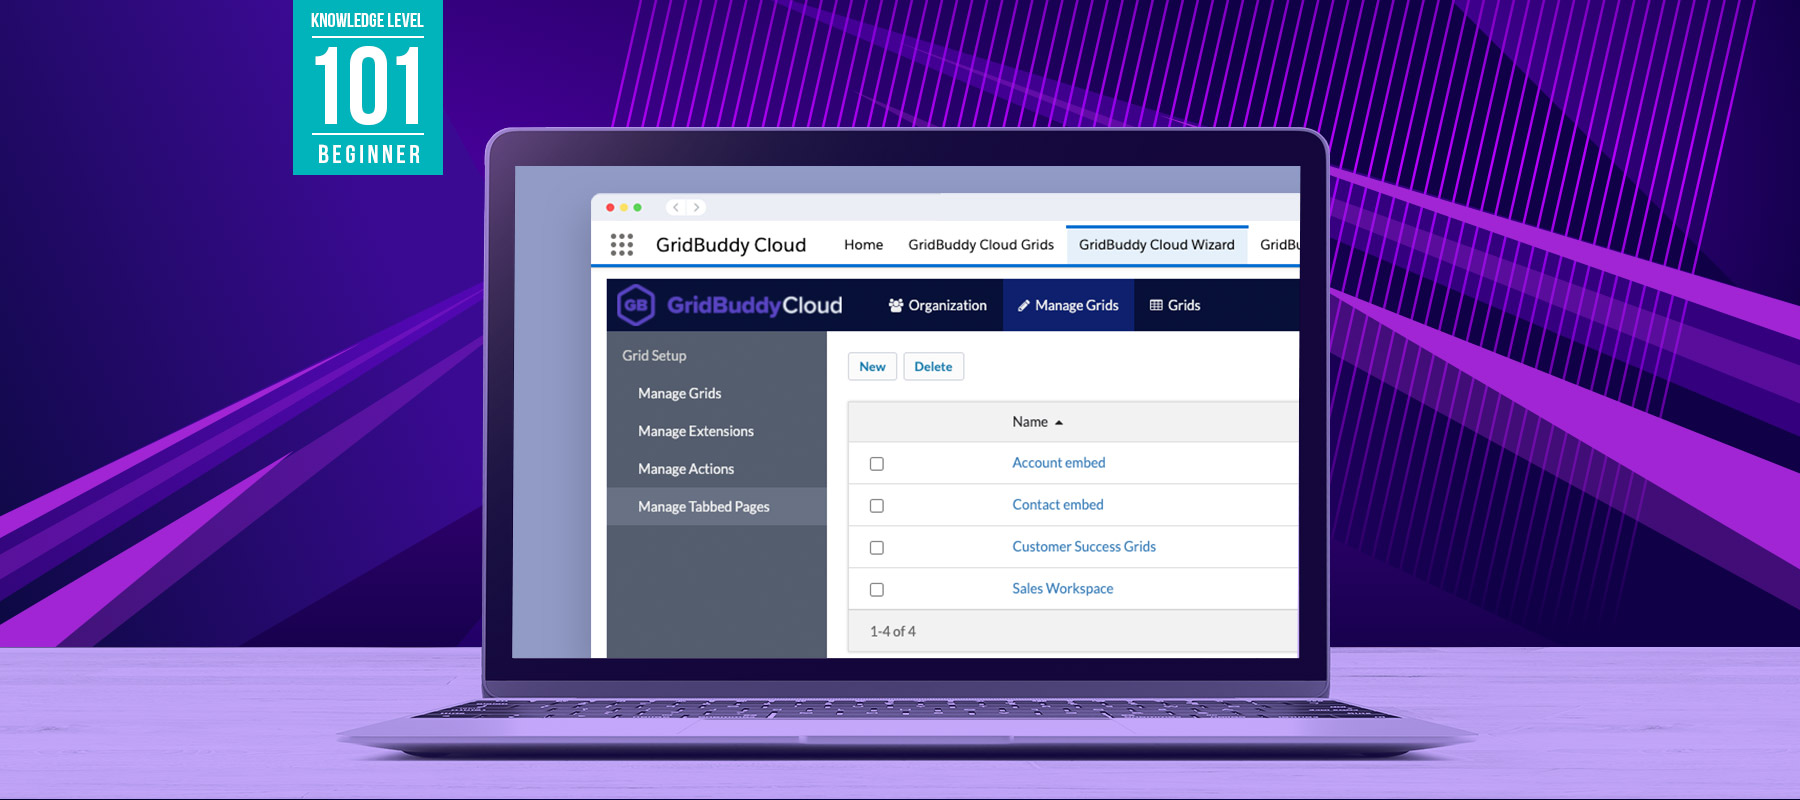
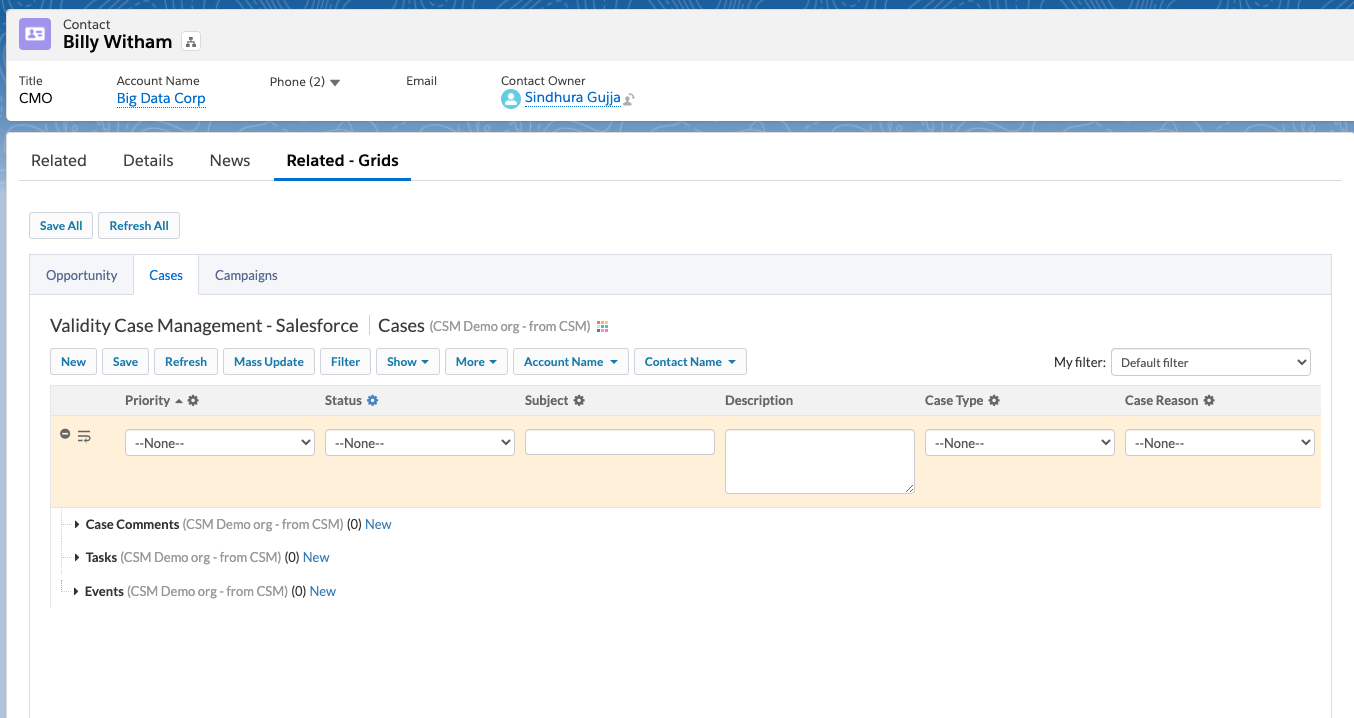
First, you need to build the grids you want to put on the Salesforce record. This means going to your GridBuddy Cloud Wizard tab, clicking “Manage Grids,” and creating the grids you need. In this example, I’m replacing the Related Items on the Contacts record. I need an Opportunity Grid, a Cases Grid, and a Campaigns grid.
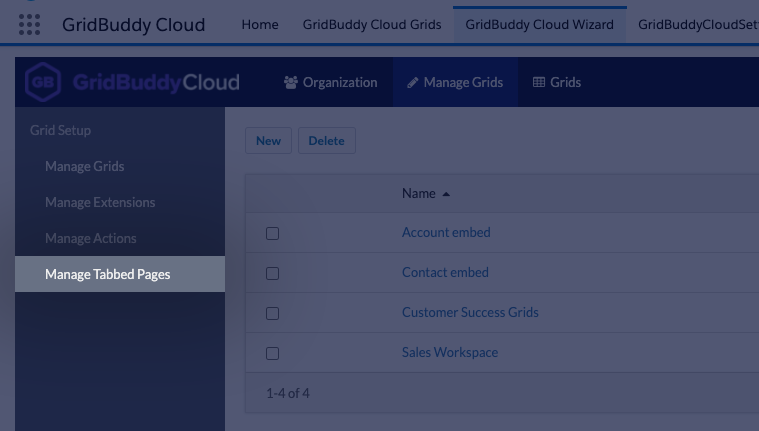
Once your grids are built, you need to put them into a GridBuddy tabbed page. Go to the GridBuddy Cloud Wizard tab and click “Manage Tabbed Pages.” Click the “New” button to create a new tabbed page, name it, select the grids you want to appear in your tabbed page and add URL parameters for each. Click “Save” when you’re done.
(For detailed instructions on setting up a tabbed page, check out this Validity Community article.)
Now that you have a GridBuddy tabbed page, it’s time to embed it onto the Salesforce record. Navigate to the record, edit the page, add a new tab, and drag the “GridBuddy Cloud” Lightning Component onto it. Copy the “Embeddable URL” from your GridBuddy Cloud Manage Tabbed Page and paste it into the component. Save and voilá!
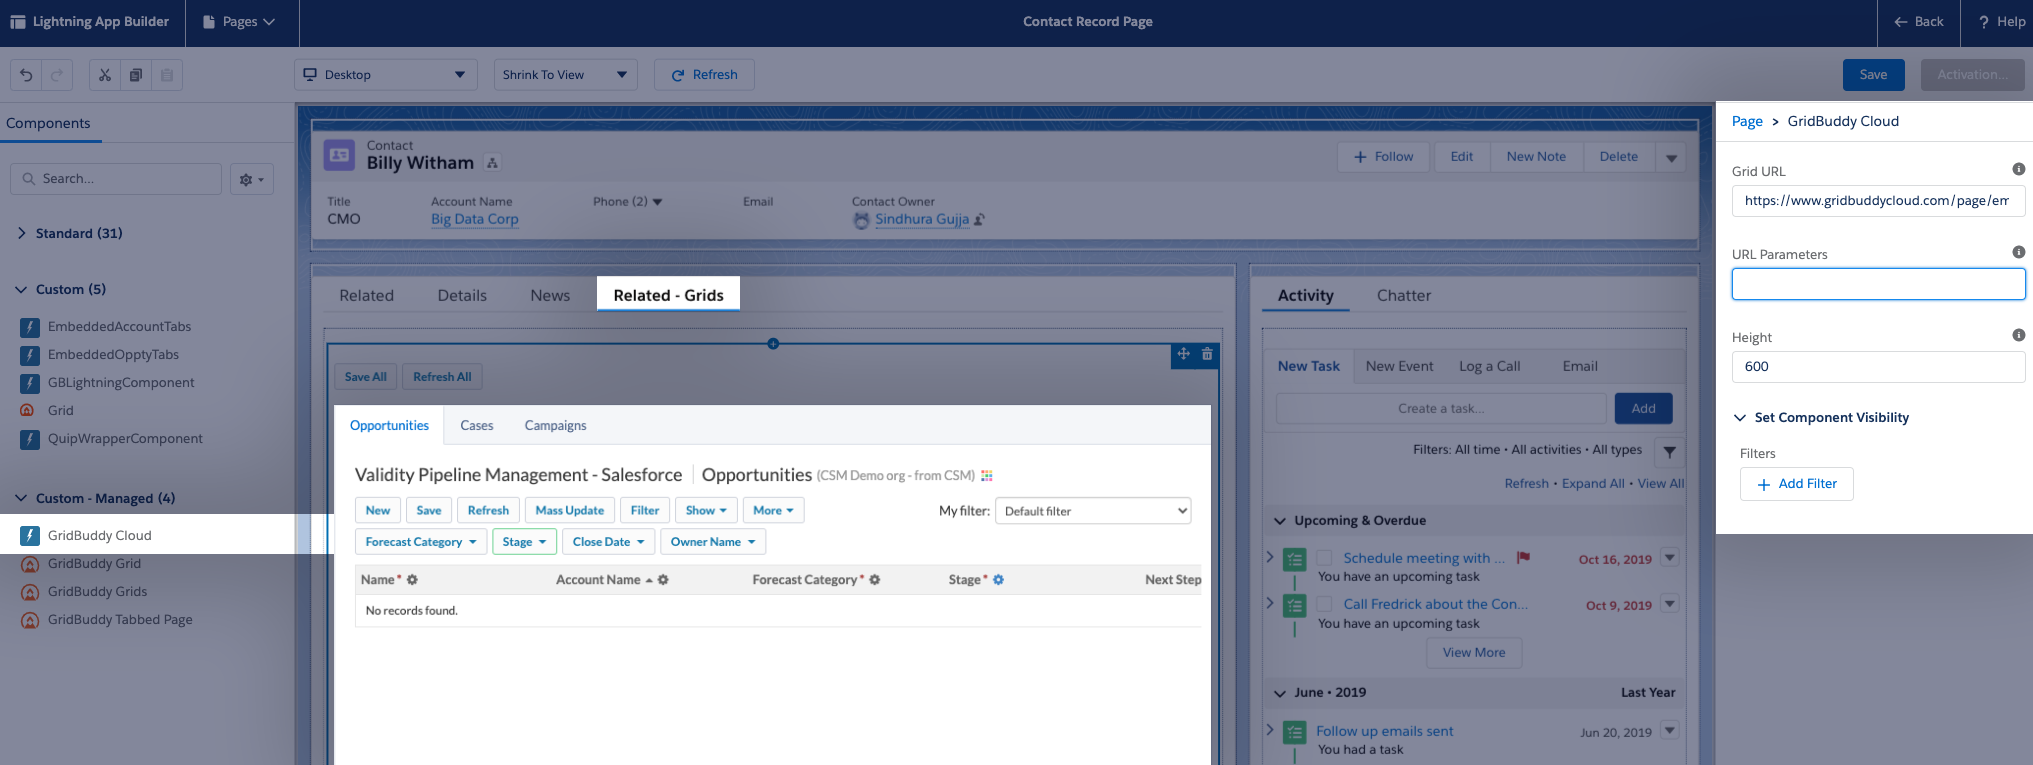
You now have a new tab on your Salesforce record. Click the new tab to access your GridBuddy Cloud tabbed page. If the Grid URL Parameters you set up are correct, you’ll see the same data in your grids as what appears in the Related Items tab. If you see something different, go back to your Manage Tabbed Pages and try a different FPF parameter.
With an embedded grid, not only can you view your related items, you can also create new related records, edit existing related records, and (if you have permission) delete, all without leaving the comfort of the Salesforce record.
Curious? If you’d like to try it out, register for a free GridBuddy Cloud 30-day trial and see what you think.